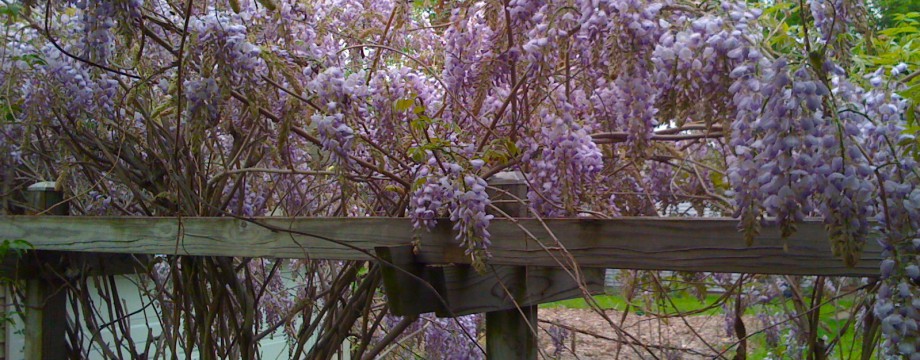
My bees didn’t make it through the winter. With the warmer weather in the last couple of weeks, I should have seen some activity outside my hive, but it remained eerily quiet. So finally, on a warm day, I opened up the hive. All I saw were dead bees. With sad thoughts, I cleaned out the hive and removed the combs that still had honey.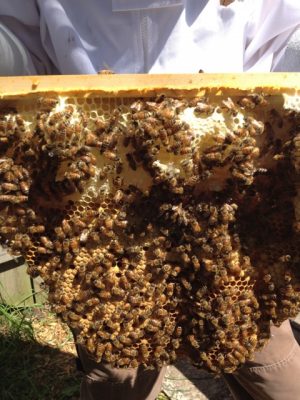
I have a top bar hive. My bees build comb that hang down from wooden bars in wonderful organic shapes. With this type of hive, in order to get honey, I have to cut the combs off the bars, crush the comb, and somehow separate the honey from the wax.
The last time I tried to extract honey from my crushed combs, I used the double boiler method. The idea was to completely melt the wax. Then, when the wax–honey concoction cooled, the wax would rise to the surface and be able to be skimmed off.
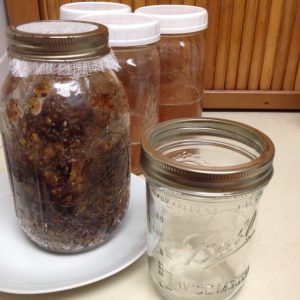
I didn’t have a double boiler, so I had to improvise. Crushed wax and honey went into a pot that went into another pot filled with water. Then the two pot contraption went on the stove. I stirred the mixture, scooping the wax that rose to the surface with a spoon and dumping it into a bowl. Once everything was liquified, I poured the honey–wax solution through a sieve into another bowl. Since there still looked like there were particles in the strained mixture, I tried melting everything again and straining through cheesecloth. Eventually I managed to get honey into mason jars. Much as I tried to skim off the wax, it managed to get into the mason jars as well. Consequently, when the honey mixture cooled in the jars, the wax solidified to form thick wax caps at the top of the jars. By the end of the whole process, I was left with a messy, sticky kitchen filled with messy, sticky pots, bowls, utensils, and a sieve that would never be the same.
 So this year, I wanted to try something less complicated and less sticky. I found instructions on the internet for a simple filtering system using two mason jars. I cut the combs off the bars, crushed the honeycomb in a bowl and put the crushed comb into a wide mouth quart mason jar. The instructions recommended using a screen of some sort, but, having no screen, I draped cheesecloth over a second, empty, wide mouth mason jar and screwed on the metal band to hold the cheese cloth in place. I duct taped the two mason jars together, metal band to metal band, flipped the pair over, and let the honey drip through.
This was less complicated, but still sticky. Honey still managed to find its way through the duct tape to leak onto the outside of the jars and onto the counter.
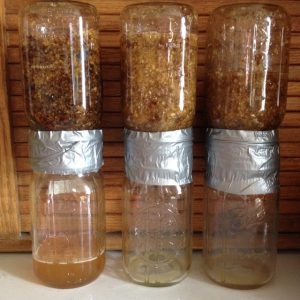
But then I got the brilliant idea of using both a wide mouth and a narrow mouth mason jar. It turns out that, even with both bands screwed on, the opening of a narrow mouth mason jar fits nicely inside the opening of a wide mouth mason jar. I put crushed comb into a narrow mouth quart mason jar, draped cheesecloth over the opening and screwed on the band. I then put a wide mouth pint mason jar with its band, but no cheesecloth, over the top of the quart jar and flipped the pair over. I still duct taped the pair together, mainly to prevent insects from crawling into any opening.
No more leaking!
I’m finding, however, that the straining is taking a very long time, days and days instead of the promised hours in the instructions. Perhaps my house isn’t warm enough. Perhaps the honey is a bit crystallized after being outside all winter long.
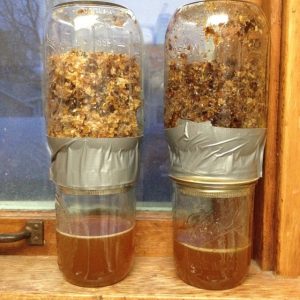 Nonetheless, slowly and surely, thick droplets of honey are filtering down into my honey jars. My anticipation builds.
Meanwhile, I’ve ordered another package of bees for this spring. They should arrive at the end of April.
And now I know what I will do the next time I want to get honey from my hives.