 March 20 was the vernal equinox, so it is officially spring. More and more days are certainly feeling like spring. With the onset of spring comes the promise of growing gardens, and thoughts of seed starting are in my mind.
We have been starting seeds at Clay Bottom Farm for a few weeks now. Lest you worry that you have missed some important gardening window, do not fear. These starts are destined for planting in the greenhouses, not outside in the field. There is still time to start seeds that will go into an outside garden.
I prefer planting vegetables that are direct seeded in the garden, rather than those I need to start indoors from seeds. I do not have a proven track record for successful indoor seed starting. But some vegetables, such as tomatoes and peppers, need a longer growing season and should be started indoors while danger of frost remains outdoors. (Yes, I do know that tomatoes are, technically, a fruit.) Furthermore, if I want particular heirloom tomato varieties, I cannot always rely on being able to purchase plants of those varieties. So I do need to start some tomatoes from seed. One thing I particularly wanted to learn during my apprenticeship was how to more effectively start tomatoes from seed.
Growing Medium: Seeds should be started in a high-quality potting mix, preferably organic. Seed starting mix can be purchased or made. Jean-Martin Fortier, in his book “The Market Gardener,” gives a recipe for a homemade potting mix consisting of peat moss, perlite, compost, garden soil, blood meal and lime.
To start tomatoes, the soil should be damp but not too wet. For most of the vegetables we plant, we test the soil by grabbing a handful and squeezing. If we can squeeze some drops of water from the soil, then that soil has the proper amount of moisture. However, tomatoes require the soil to be a bit drier than that. It should still feel damp, but you shouldn’t be able to squeeze water out.
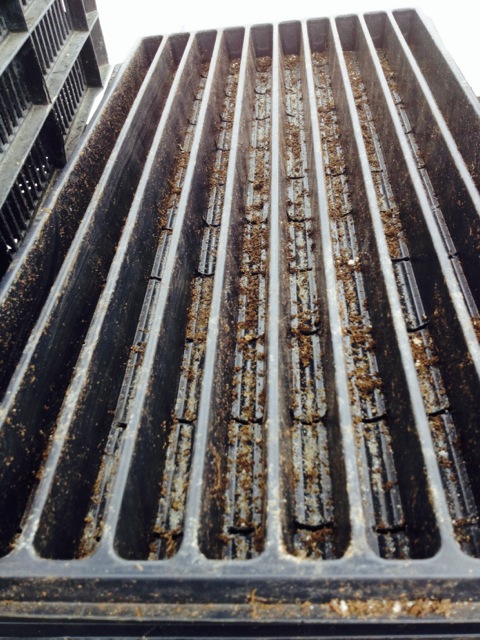 Potting Up: At Clay Bottom, tomatoes are grown using a multistep process. The seeds are planted in 10 or 20 row seed-starting flats. We fill these flats with the potting mix, making sure the soil fills each row completely to the brim but not packing down the soil. The tomato seeds are placed about 1 inch apart on top of the soil and then vermiculite is spread over the seeds. This helps keep moisture in the soil.
Then the flats are put into the germination chamber. The germination chamber, with a heating element submerged in water, provides a warm (78°F) and humid environment for the sprouting seeds.
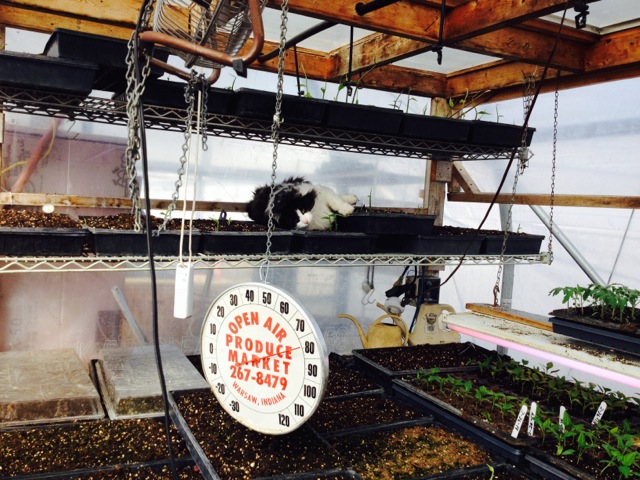
Once the seeds have sprouted, the flat is moved to a heated mat under fluorescent lights in the “mini-greenhouse in a greenhouse.” This small greenhouse is also kept at around 75°F and can be opened up in the daytime and closed up at night.
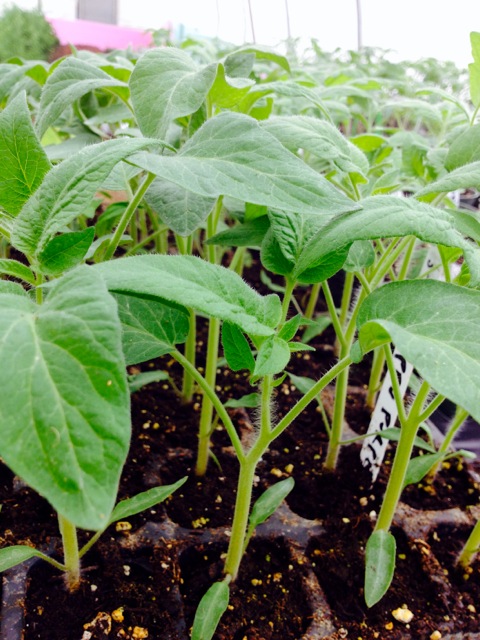
The first leaves to appear will be the cotyledons. At this point, all tomato varieties look alike. When the seedlings are about two inches tall and have sprouted their true leaves, they are transplanted into a 50-cell seeding flat. The 50-cell flat is kept in the mini-greenhouse until the plants are about 4-5 inches tall. Then the plants are transplanted to 4-inch round pots and the pots are kept on tables in the greenhouse until the tomatoes are transplanted into the ground.
This process of germinating seeds and then transplanting the seedlings into bigger and bigger pots is called “potting up.” Tomatoes need to grow a long time in cells or small pots before being transplanted in the ground. Potting up gives the plants extra root space and new fertile soil in which to grow. At each stage of transplanting, the plant should be big enough that its root clump holds together. If we find that many plants in a flat have roots that are not holding together well, those plants are left to grow a bit more.
 Warmth, Moisture and Light: Most home gardeners do not have a germination chamber or a greenhouse of any sort, let alone a “mini-greenhouse in a greenhouse.” But some principles can still be applied to the home gardener.
The seeds need heat and moisture to germinate. Since my house is usually kept pretty cold, this is why I have trouble starting seeds. I would need to use something like a heating pad underneath my seed-starting trays to provide adequate heat. I would also need a clear dome over the trays to keep the moisture in.
Once sprouted, the seedlings need light – lots of light – otherwise the plants will become leggy and spindly. In our northern latitude, a window with a southern exposure does not provide sufficient light. To get the necessary “daylight” conditions of 16 hours, it is necessary to grow the seedlings under lights, hung only about 3 inches above the plants.
Watering the Seedlings: The seedlings do need to be watered – but not too much. The soil should be moist but not wet. Overly wet soil could cause wilting (“damping off”) due to fungal diseases. When the top of the soil is dry, we use a watering can to water the seedlings, trying not to get water on the leaves.
Transplanting Tips: When transplanting tomatoes from flat to flat to pot to the ground, you can (and should) bury part of the stem. Tomatoes can grow roots all along their buried stems. Planting deep will help the seedling grow strong, substantial root systems.
The stems are flexible and can be bent in order to plant the seedlings deeper. One caution however, when handling tomato seedlings, is to take care not to damage the little hairs along the stem. These little hairs, when buried in soil, are what will develop into roots.
Hardening Off and Planting in the Garden: Finally, at some point, the plants in the 4-inch pots are transplanted into the ground. We have not done that yet, so I may yet learn new techniques for this final transplanting.
I do know that the plants need to be gradually introduced to the outdoors: to be “hardened off.” The seedlings, in their pots, are placed in a sheltered, somewhat shaded, place during the daytime for a few days, then overnight for a few more days.
After hardening off, the tomato plants are laid on their sides in a shallow trench with only the topmost leaves above ground level. Just as in the potting up process, burying the stem will encourage more root growth. In addition, the soil will be warmer near the surface, and a warmer environment will also help build a strong root system. With a strong root system, the tomato should grow straight and tall.
 Last Frost Date: The last frost date for our area is in mid May. I tend to plant my tomatoes in the garden later than that, toward the beginning of June. Given that I should start seeds about 6 to 8 weeks prior to planting out, I should start my tomatoes from seed in a couple of weeks. Hopefully, with what I’ve learned so far, I will finally grow sturdy and strong tomato plants.